We Have A New Home!

Sponsored Links

Tuesday, February 14, 2012

How to Use Window Light - Love Your Camera: Weekly Photography Tips

First of all, Happy Valentine's Day!

Do you love this holiday or hate it? Did you get your special someone something pretty, tasty, or fragrant? Or do you purposely ignore this "Hallmark-Holiday"?

In honor of Valentine's Day, I have a great photography tip for you. It involves a very, VERY high quality computer drawing that I did myself, just for you. What can I say, I am a true artist.

Today, I want to talk about using window light [or patio door light in my case] to enhance your photos and create specific looks or moods. When you have light coming in a window or a door, you have basically three options on how to use that light. We'll talk about all three.

But first, here is my computer drawing of my living room, so you can get a feel for the layout and where the following photos were taken. Please, don't judge me based on my ability to draw or write with a mouse. I don't have one of those fancy tablets and well... be kind.


PurseTutorial
So the light is coming in the patio door and flooding my living room with pretty natural light. Because I don't have any kids or pets to photograph and my usual model was at work when I created this tutorial, we're going to look at my lovely Kelly Moore 2 Sues bag as an example.

One option when you are using window light is to backlight your subject. This means putting your subject in front of the window, and then adjusting your exposure so that your subject is correctly exposed. This can create a very dramatic photo, with a lot of contract between the subject and the blown-out/white background. If you are shooting on auto mode or even aperture priority, this type of situation will often give you a silhouette, where your subject is black and the background behind it is properly lit. This is a situation where manual mode is best, so you can choose your exposure settings and make sure your subject isn't completely black.
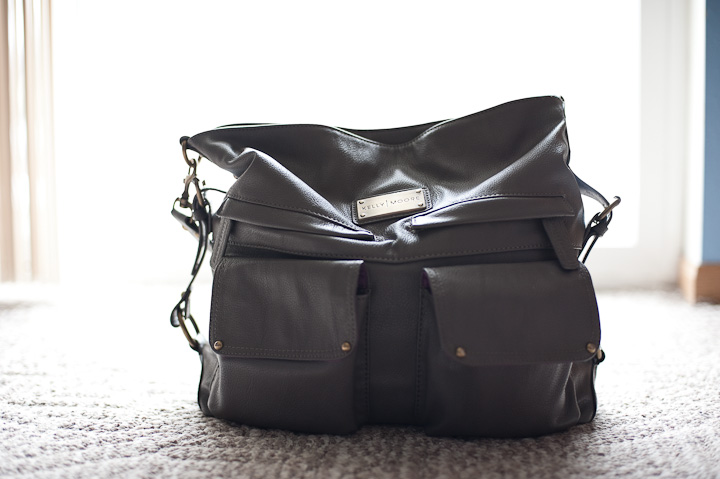
LKR_5985
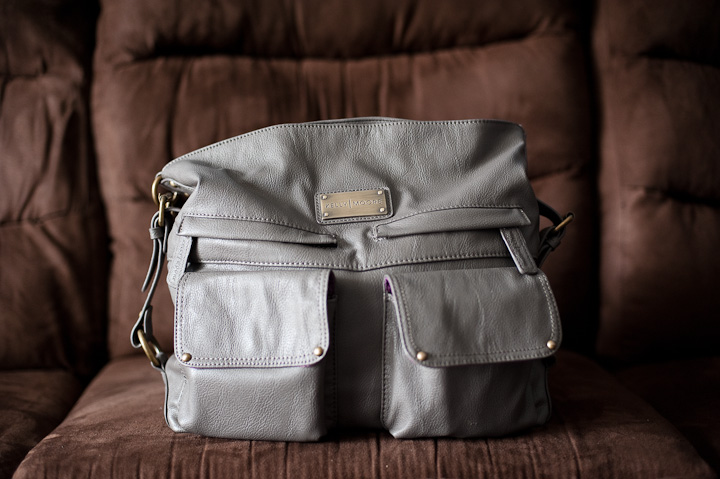
The next option when using window light is to position your subject at a 90 degree angle to the window, resulting in side lighting. As you can see with the bag, the light is coming in from the camera's left, and lighting up that side of the bag really nicely. The opposite side of the bag though has a lot of shadows in it. Imagine that this was a photo of a person, or a closeup of their face. The side closest to the window would be very well lit, but the opposite side would be in shadow. This is ok if that is the look you are going for. It can give you a very moody and interesting portrait.


LKR_5986
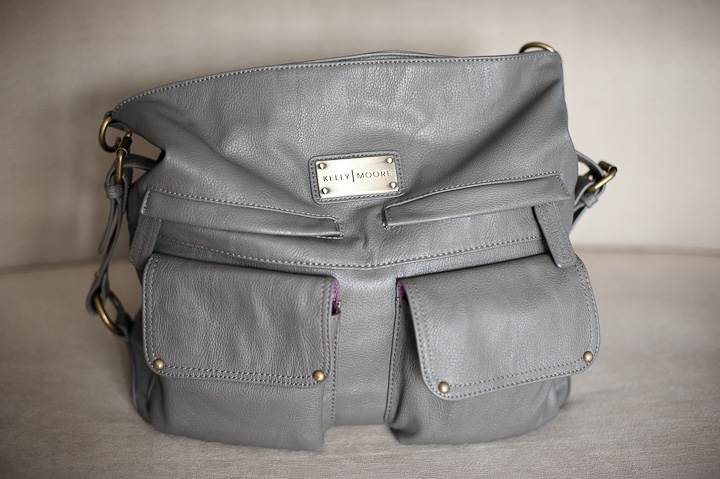
The third option for window light is to have your subject face the window so that the light is falling evenly on them. In this case, I put the bag on the chair in my above diagram. You would then be positioned in between the window and your subject. If you are shooting this way, make sure that you aren't blocking the light that is falling on your subject as you shoot.


LKR_5987
All three of these are good choices for positioning your subject when using window light. Which one you should use will depend on the look and feel you are going for in your photo. The option that will give you the most even and softest light would be the third one, where your subject is facing the window, and you are shooting them without blocking that light.

Happy Shooting, and if you take a photo you are particularly proud of, I'd love to see it! You can post it on the Laura Radniecki Images Facebook page, or email it to me at lauraradniecki@gmail.com!

1 comment:

  1. Excellent and useful article!
    This is very useful!Thanks for taking the time to post this.

    ReplyDelete

COMMENTS!!! I can't wait to hear from you!